The Keyword Settings page lets you configure how ConnectSafely finds relevant LinkedIn posts and controls automated commenting for each connected account. This article focuses on setting up keywords and options.
How to access Keyword Settings
- Log in to your ConnectSafely dashboard
- Open the left sidebar
- Click Keywords Settings
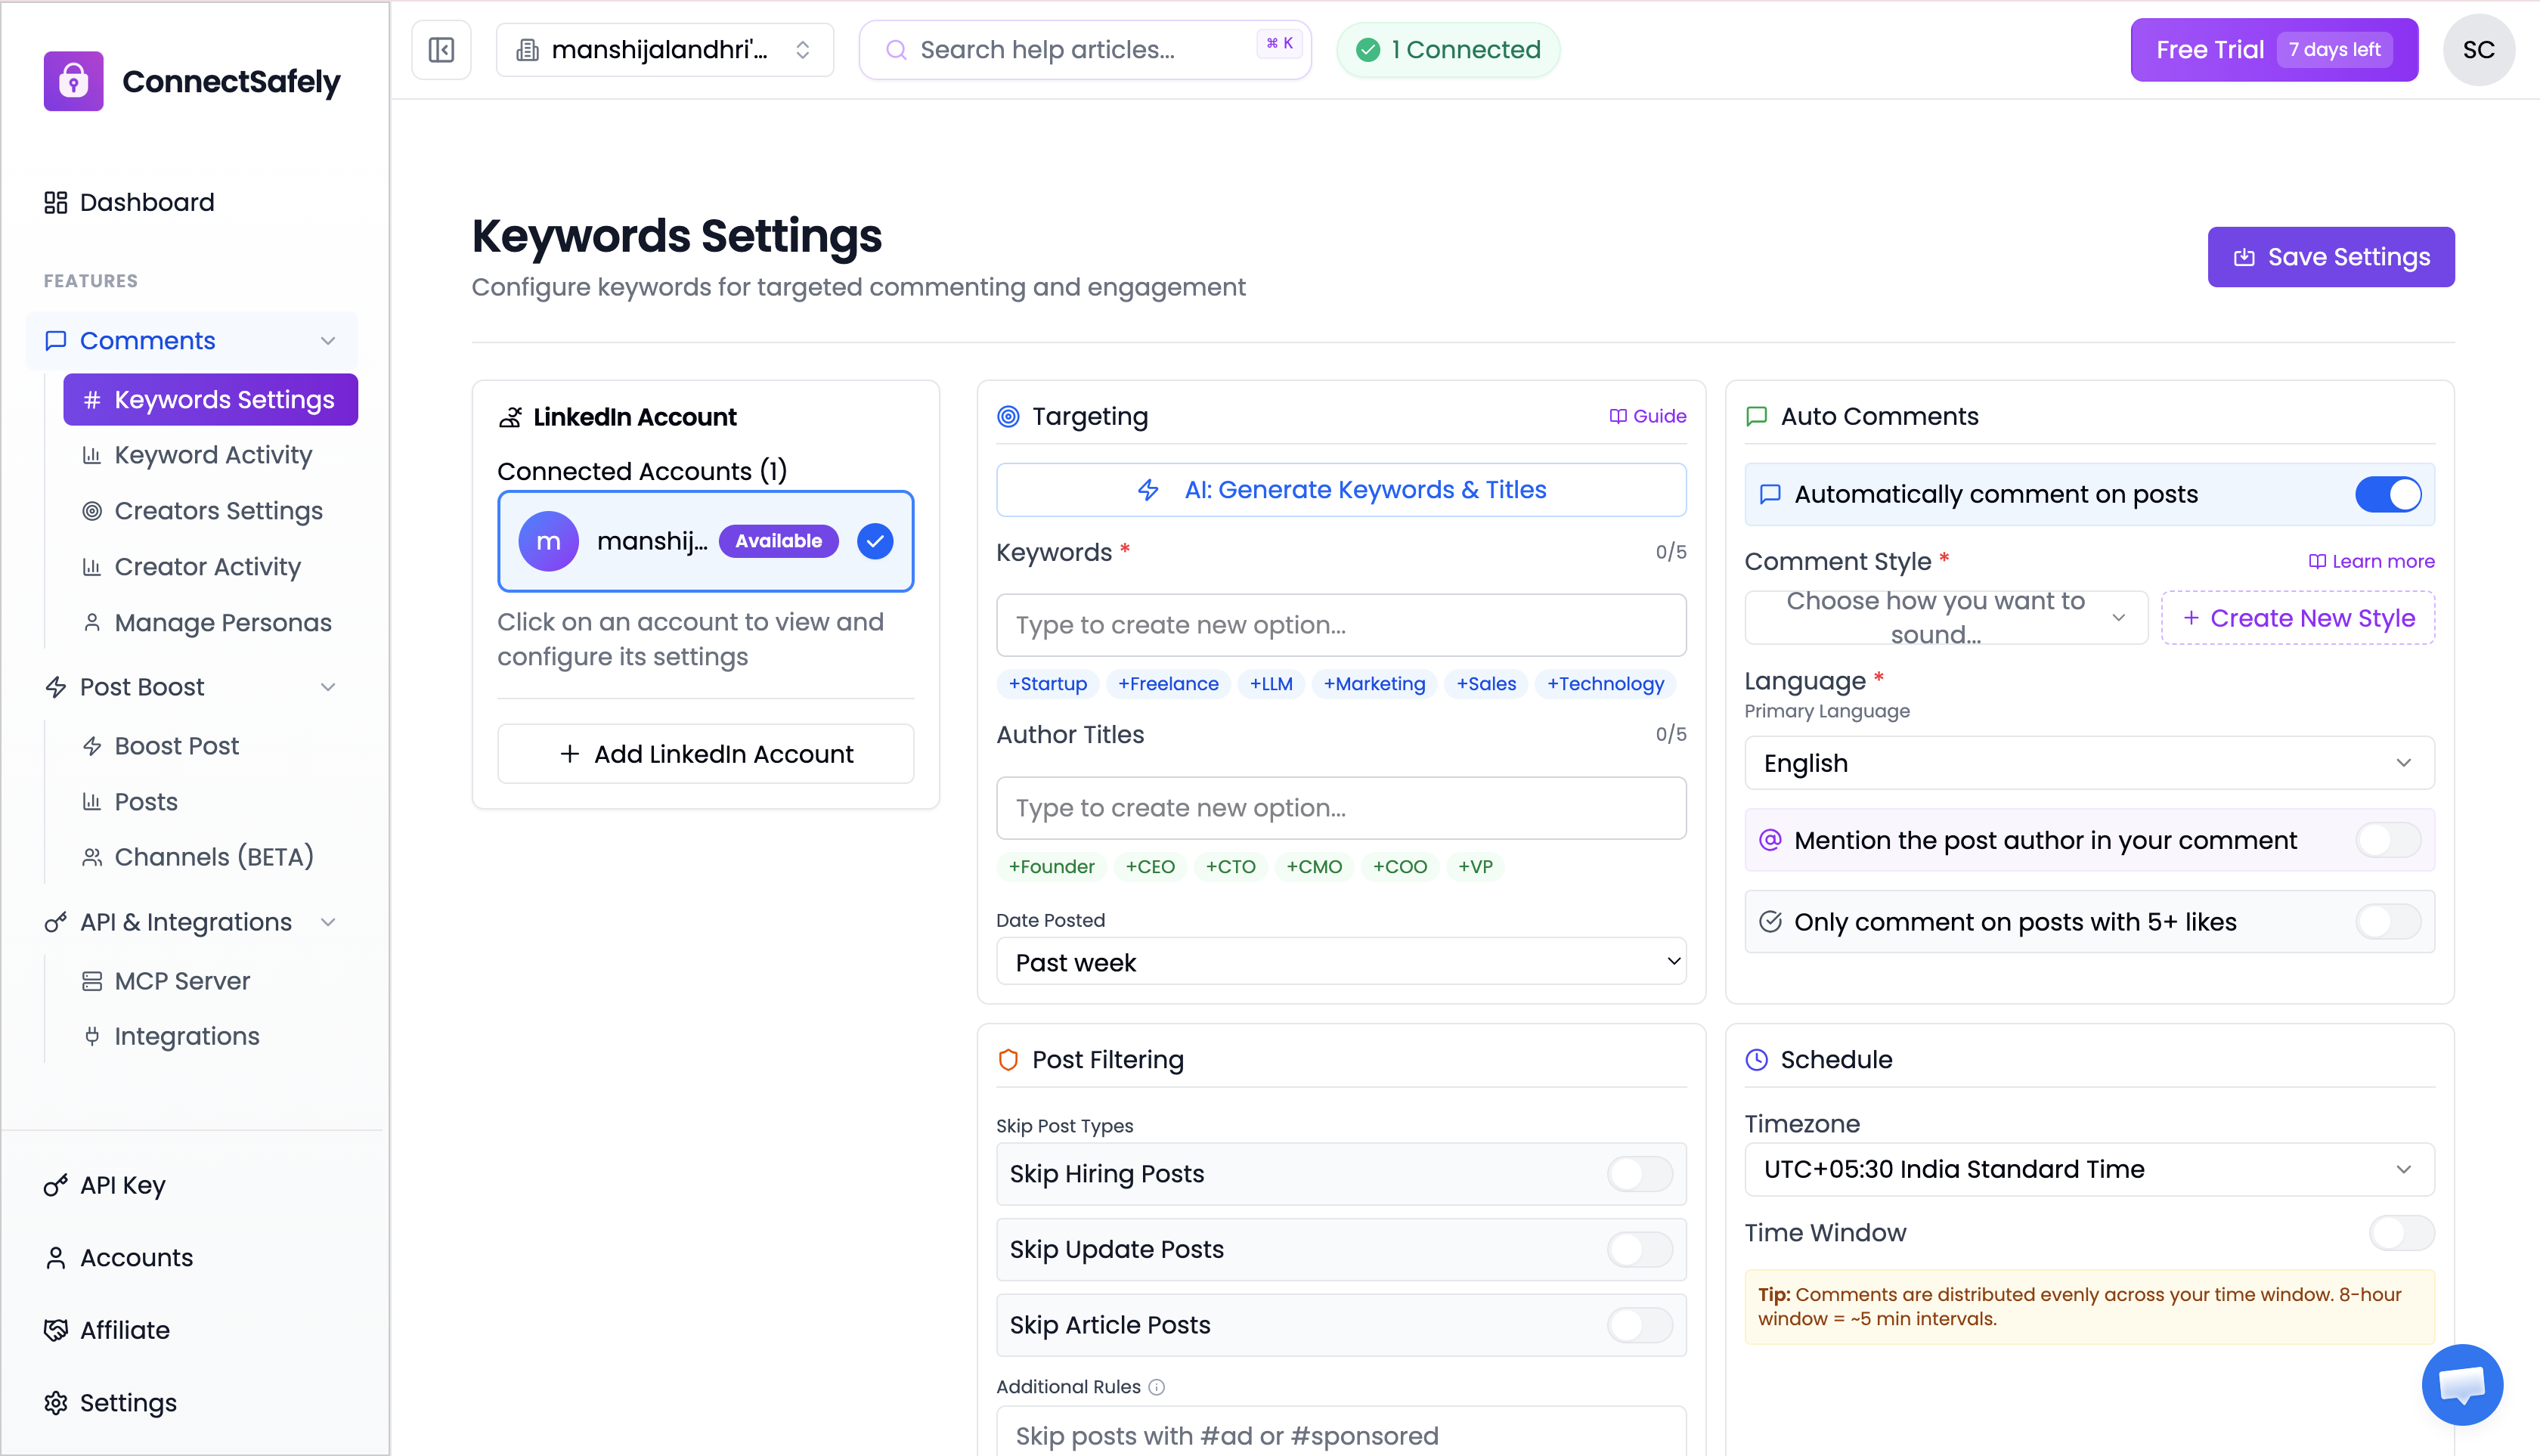
ConnectSafely Keyword Settings interface showing account selection, auto commenting toggle, and configuration options.
LinkedIn Account Selection
- View all connected LinkedIn accounts
- Select the account you want to configure
- Add a new LinkedIn account if needed
- Each account can have its own keyword configuration.
Auto Commenting
Use the Auto Commenting toggle to enable or disable automated commenting for the selected account.
Persona & Language Settings
- Select a persona to define the comment tone
- Choose a primary language for generated comments
- Date Posted- Filter posts by time range (e.g., Past 24 hours, Past week) to ensure relevance
Learn more about how personas work to customize your engagement style.
Author Targeting (Post Author Titles)
- Add up to 5 job titles
- Target posts from authors with specific roles
- AI Smart Suggestions - Automatically generate relevant job titles based on your niche
- Use quick-add suggestions for common titles
Keyword Configuration
- Add up to 10 keywords (Pro plan)
- Keywords are used to find relevant LinkedIn posts
- AI Smart Suggestions - Generate relevant keywords based on your industry
- Quick Add - One-click addition of popular keywords
- Only posts matching your keywords are considered
Engagement Controls
- Tag post author - Mention the author in your comment to increase visibility
- Engagement Check - Only comment on posts with minimum engagement (at least 5 likes or comments)
- Post Evaluation Rules - Configure rules to skip certain posts:
- Skip Hiring Posts
- Skip Update Posts
- Skip Article Posts
- Additional Rules - Define custom text rules (e.g., "Skip posts with #ad")
- AI Post Evaluation (Pro) - Use AI to evaluate post content against custom criteria before commenting
Timezone & Comment Schedule
Control when your automated comments are posted by configuring your timezone and preferred commenting hours.
- Timezone - Select your timezone to ensure comments are scheduled according to your local time. You can choose from:
- UTC Offsets - Simple offset-based selection (e.g., UTC+05:30 for India Standard Time, UTC-05:00 for Eastern Time)
- IANA Timezone Names - City/region-based selection for automatic daylight saving adjustments:
- Americas: America/New_York, America/Los_Angeles, America/Chicago, America/Denver
- Europe: Europe/London, Europe/Paris, Europe/Berlin, Europe/Amsterdam, Europe/Moscow
- Asia: Asia/Kolkata, Asia/Dubai, Asia/Singapore, Asia/Tokyo, Asia/Shanghai, Asia/Hong_Kong
- Pacific: Australia/Sydney, Australia/Melbourne, Pacific/Auckland
- Africa: Africa/Johannesburg, Africa/Cairo, Africa/Lagos, Africa/Nairobi
- Comment Time Window - Define the hours during which comments should be posted:
- Start Time - When to begin posting comments (e.g., 09:00)
- End Time - When to stop posting comments (e.g., 17:00)
- Enable/Disable - Toggle the time window on or off
How it works: When enabled, your daily comment quota (up to 100 comments) is distributed evenly across your configured time window. For example, with an 8-hour window (09:00-17:00), comments are spaced approximately every 4-5 minutes to appear natural and avoid rate limiting.
If no time window is configured, comments are distributed across a 24-hour period by default.
Saving Your Settings
Click Save Settings to apply your configuration. After saving, you can monitor your keyword activity in the Keywords Activity section.
Related Articles