This guide explains how to add your LinkedIn Company Page to ConnectSafely and configure it for automated engagement — including keyword targeting, creator targeting, and activity monitoring. Once configured, your company page can automatically engage with relevant LinkedIn content and increase brand visibility.
📋 What You'll Set Up
- ✅ Add your LinkedIn Company Page
- ✅ Enable auto commenting
- ✅ Configure keyword targeting
- ✅ Set up creator targeting
- ✅ Monitor activity
Step 1: Add Your LinkedIn Company Page
- Go to Accounts from your ConnectSafely dashboard
- Click Add New (top right)
- Select Add Company Page from the dropdown
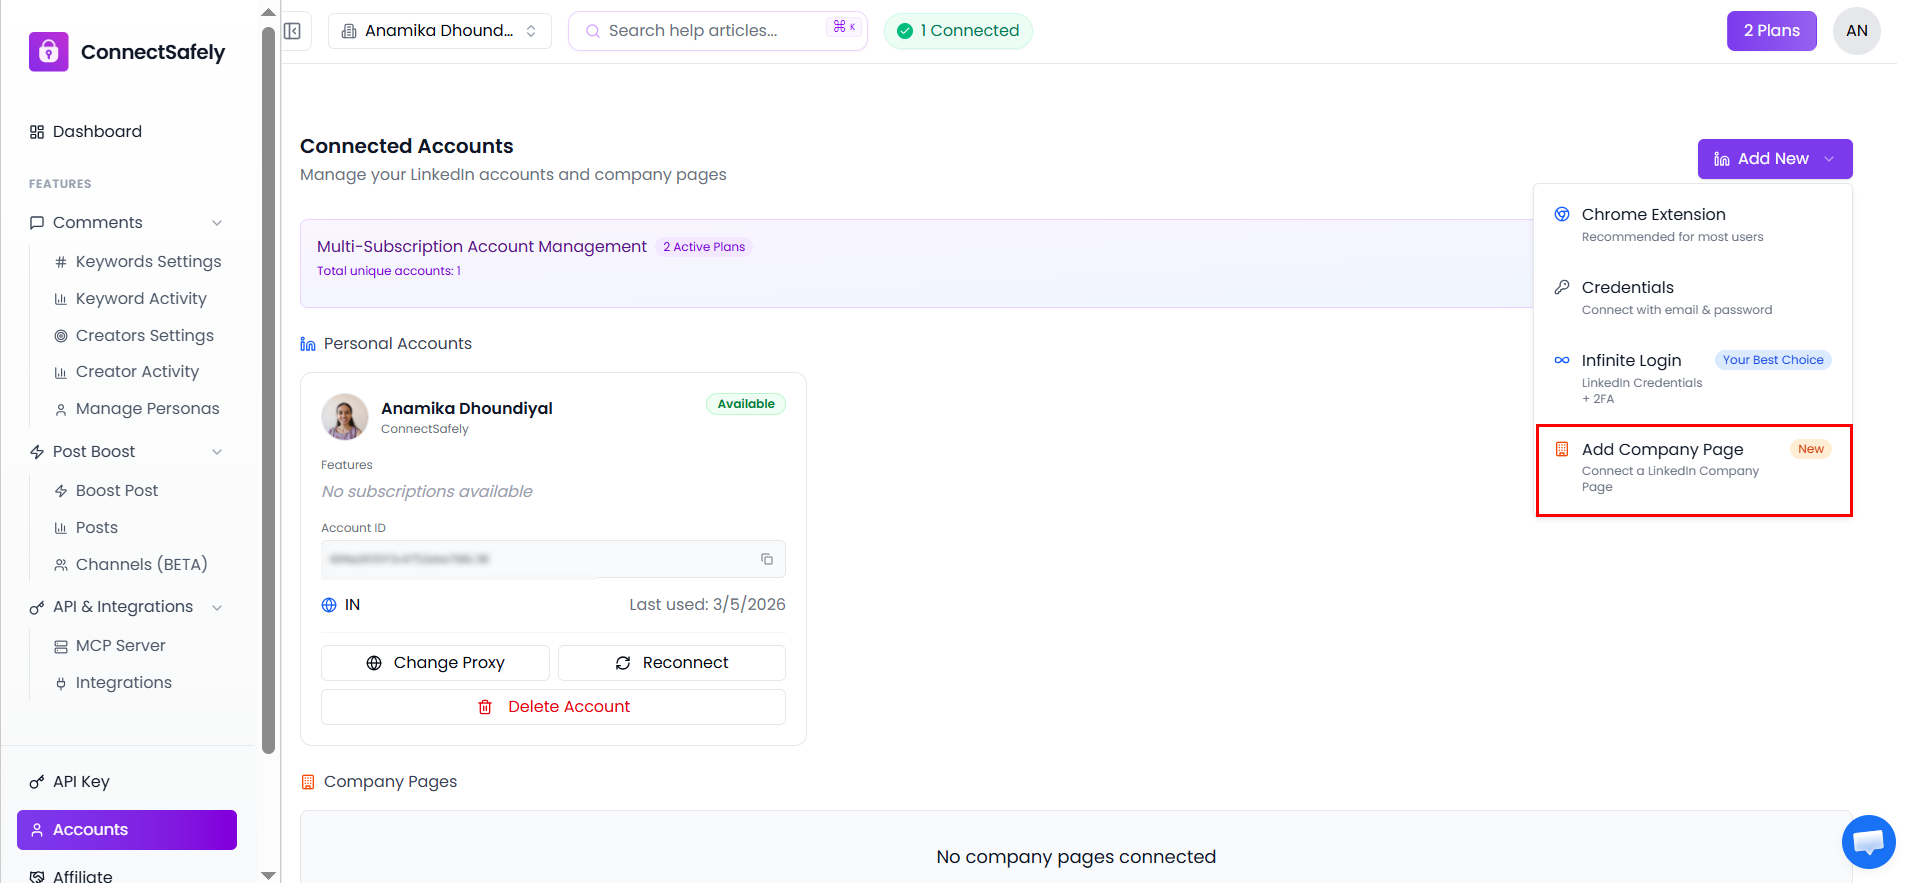
Click Add New then select Add Company Page from the dropdown.
A pop-up will appear showing your connected LinkedIn accounts. Click on your LinkedIn account to select it.
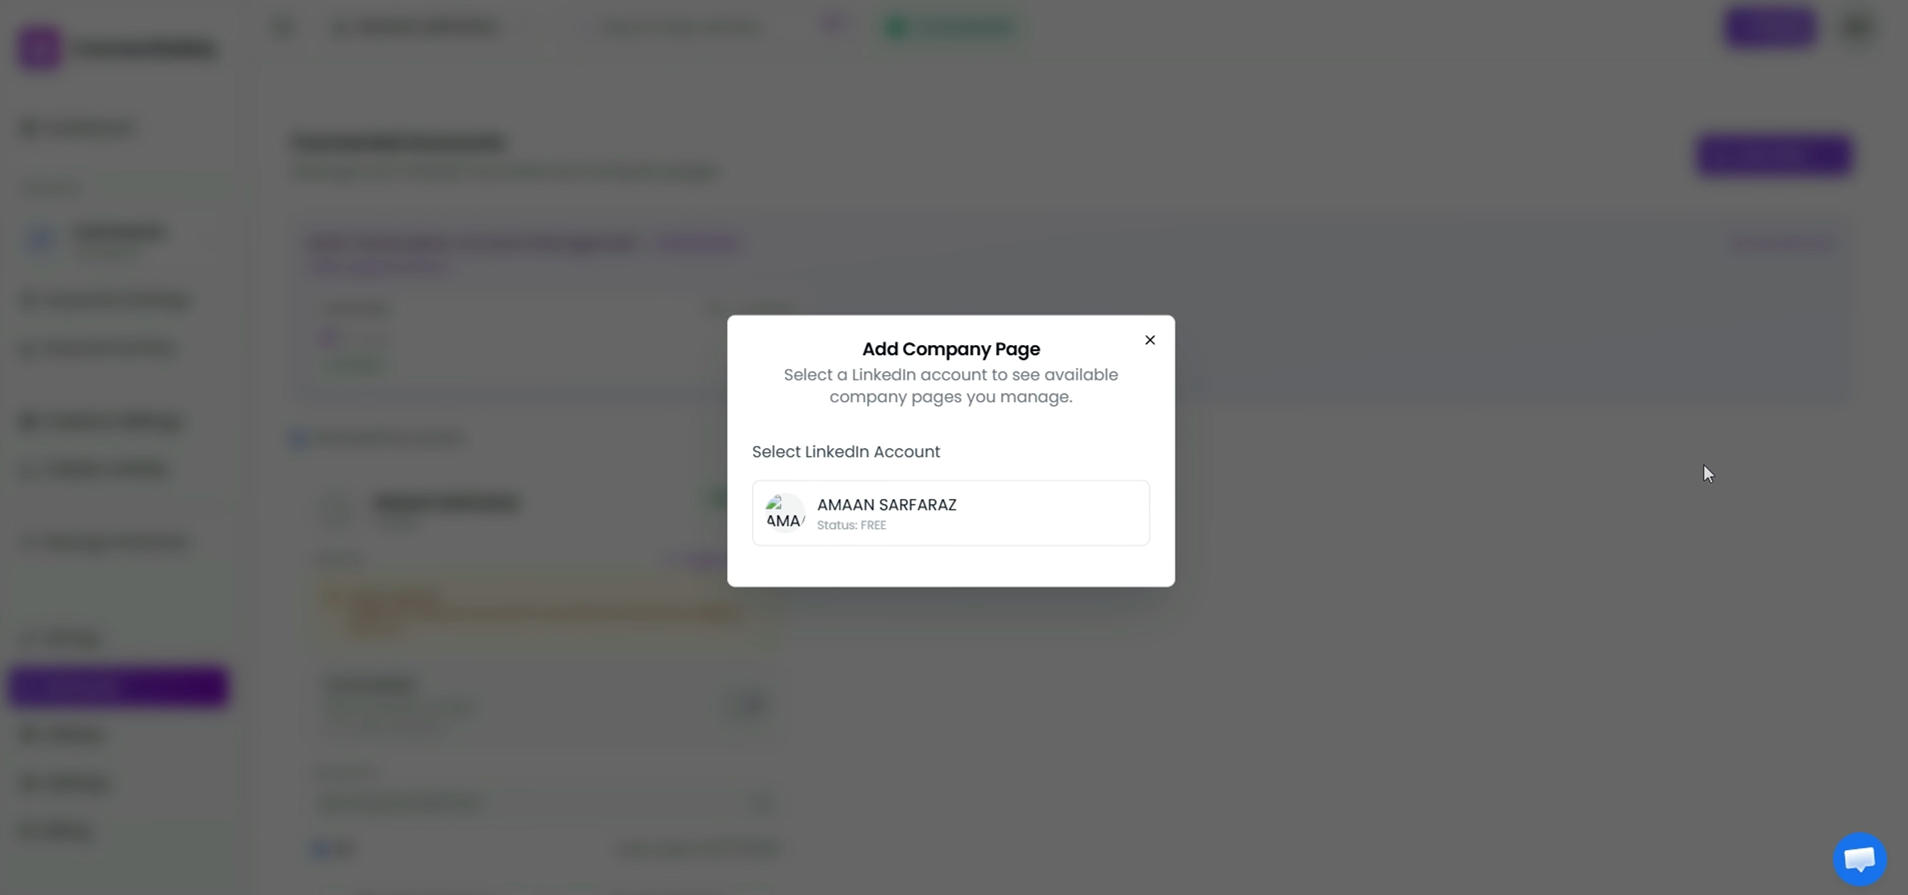
Select your LinkedIn account — ConnectSafely will automatically fetch all company pages linked to it.
ConnectSafely will automatically fetch all company pages linked to that account. Click Add next to the company page you want to connect.
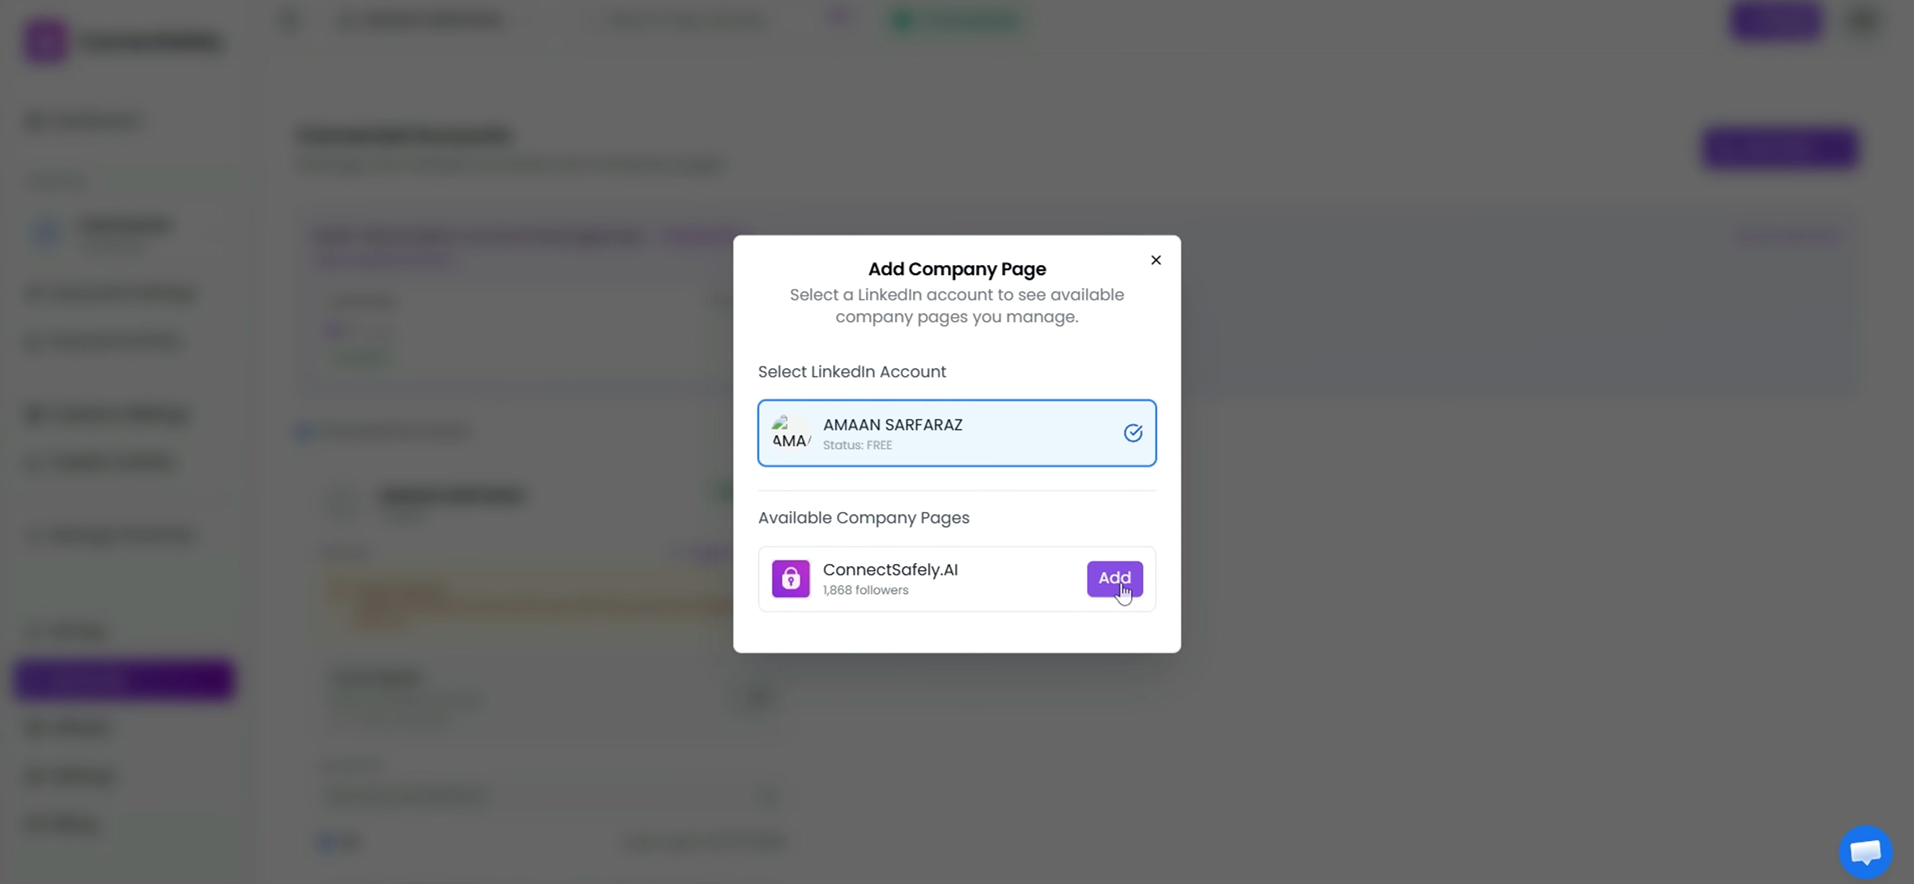
Click Add next to the company page you want to connect.
Your company page will now appear under the Company Pages section in Accounts.
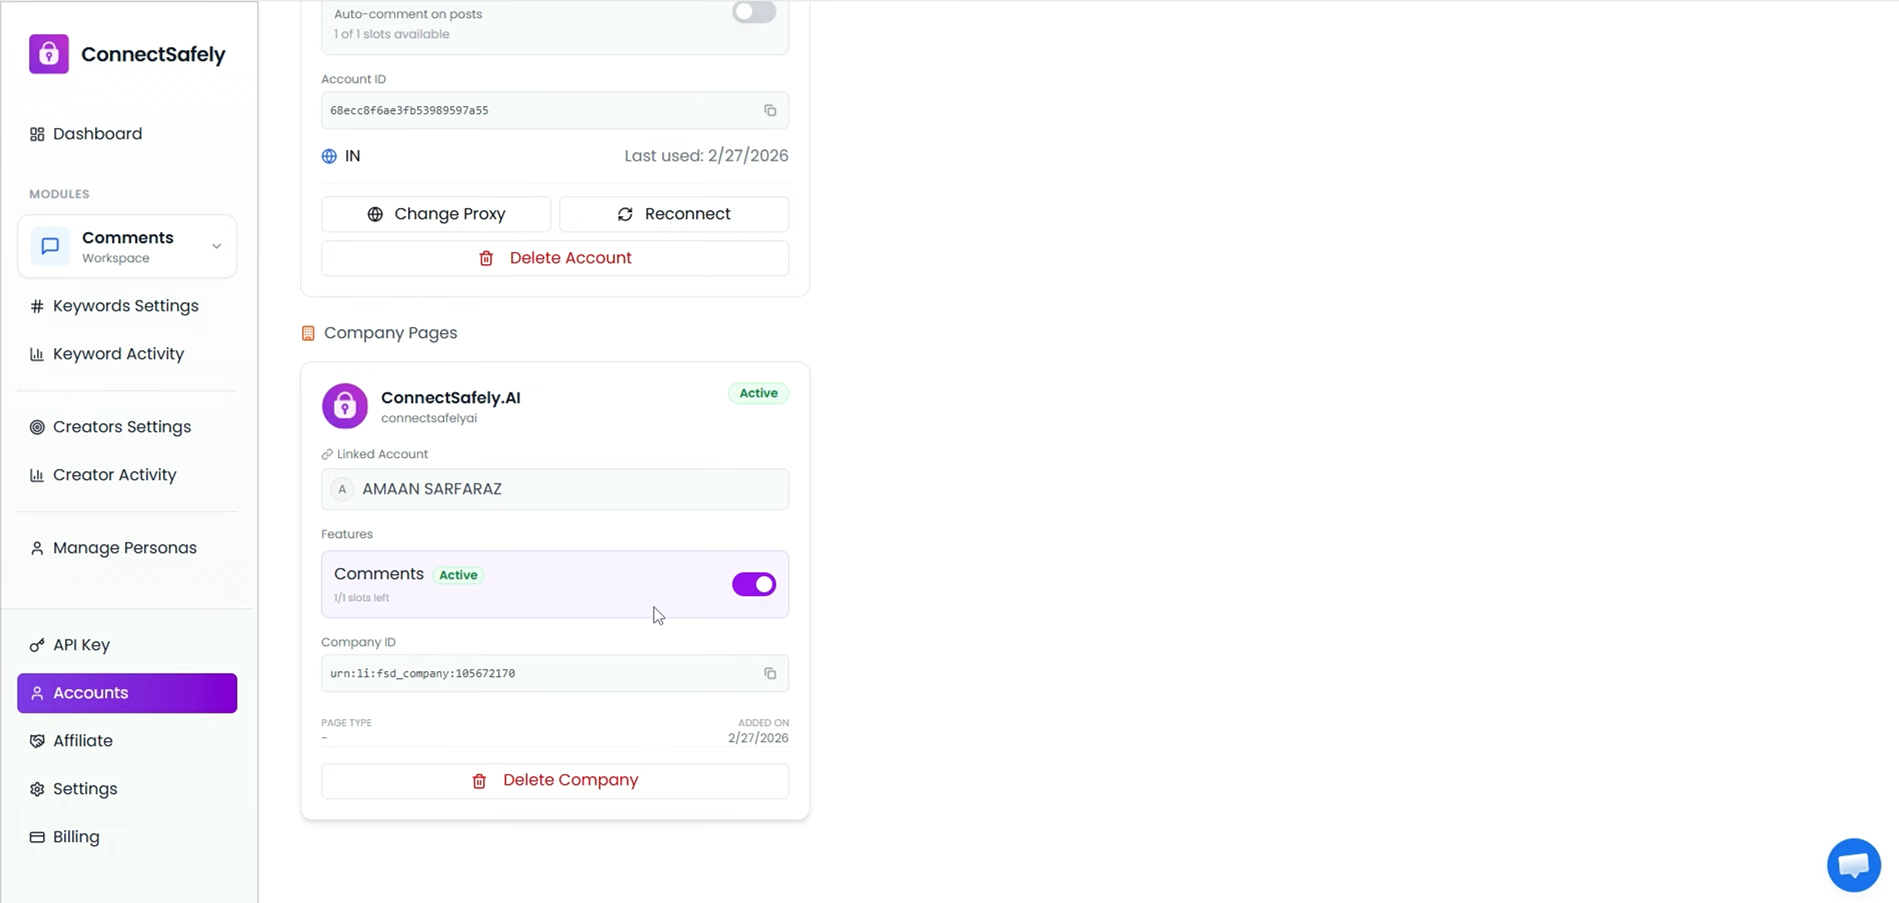
Your company page is now connected and visible under Company Pages in Accounts.
Step 2: Enable Auto Commenting
⚠️ Comments Pro Required: Auto commenting for company pages requires the Comments Pro plan. Subscribe from the pricing page to activate this feature.
Once your Comments Pro plan is active:
- Enable commenting for your company page using the toggle in the Company Pages section
- This allows your company page to automatically engage with relevant LinkedIn posts
Step 3: Configure Keyword Targeting
- Navigate to Keyword Settings from the left sidebar
- Select your company page from the list
You can set up keyword targeting in two ways:
Option A — AI-Based Keywords
Automatically generate keyword suggestions and post titles using AI. Fast and intelligent targeting out of the box.
Option B — Manual Keywords
Manually enter keywords relevant to your niche or campaign goals for precise control.
You can also use post filters to refine which posts get engaged with:
- Filter posts by date posted — target fresh, timely content
- Skip hiring posts — avoid irrelevant job-related content
- Skip update posts — focus on original content
- Skip article posts — target short-form posts only
Use the toggle switchto enable or disable auto commenting at any time. You can also create a new persona or select an existing one — personas define the tone, style, and voice used in your company's comments.
Step 4: Configure Creator Targeting
- Navigate to Creator Settings from the left sidebar
- Select your company page
From Creator Settings you can:
- Assign a persona for creator engagement
- Choose to mention the post author in comments for higher visibility
- Comment only on posts with more than 5 likes — ensuring engagement with posts that already have traction
Adding Creators
Manual Method
Paste a LinkedIn creator's profile URL directly to add them to your creator targeting list.
Get Suggestions Feature
Browse recommended top creators in your industry and add relevant ones with a single click.
This allows your company page to strategically engage with high-value creators and their audiences.
Step 5: Monitor Activity
Track all automated engagement from your company page in two places:
- Keyword Activity — view comments triggered by keyword targeting
- Creator Settings — view engagement with specific creators
This ensures full transparency and performance tracking across all automated activity.
🎉 Final Result
Once fully configured:
- ✅ Your company page automatically comments on relevant posts
- ✅ Engagement aligns with your selected keywords and creators
- ✅ Comments reflect your selected persona's tone and style
- ✅ Your brand visibility increases organically
This helps build authority, grow presence, and generate inbound leads — without any manual effort.